 |
|
|
|
|
|
| By
Jim Jones
Ive had my 249 for a while now and have
always been a bit ambivalent about it. On the one hand, it is too small,
and there is that reputation of a not quite solid bike. The motorcycle
that killed Indian. On the other hand, its got cool looks and sounds great
when running. My subconscious mind is in charge of all bike related activities,
and I have been gathering parts for this little beastie at every swap meet
for the last 5 or 6 years. Looks like the bike is here to stay. So I decided
to dig out some of the acquired pieces and bolt em on there.
|
Jim wrote a road test of the 249 and Buell Blast in VI # 9. |
||||
| Light
em up!
Found the spotlight bar a few years ago.
This past summer a pair of Unity H2 spotlights showed up. Pop the headlight
mount off, reinstall, bolting through the spotlight bar and youre good
to go!
|

Spotlights. |
||||
| Have
a seat
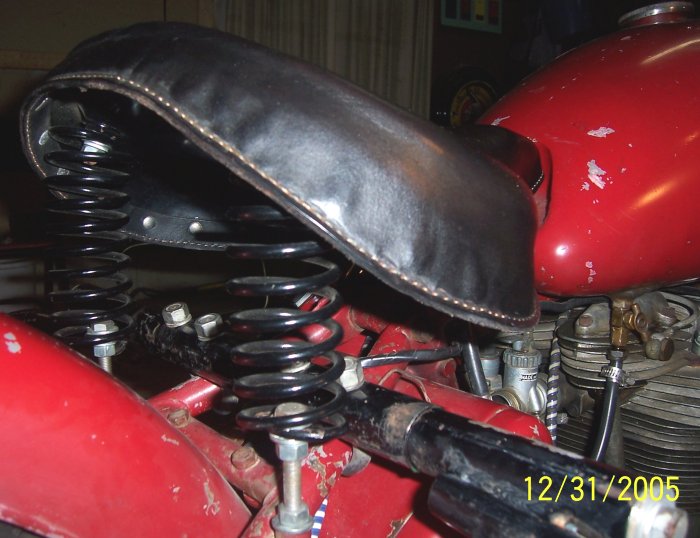
The bike as purchased had a cheap seat with a plastic seat pan. The seat pan was not able to withstand my massive posterior and soon broke. Luckily, a chum-me-seat was part of the purchase, so I installed that. The chum-me-seat for a 249 has got to be one of the fugliest parts that ever installed on a motocycle. It weighs a bunch, too. 5 or 6 years ago, solo seats and seat pans were readily available, but it took me until last year to decide to buy one. At that point, the supply immediately dried up, and I was unable to find anything affordable. Recently, I lucked into an original pan, recovered by Howard Heilman. It came with all the hardware, too. The installation was a simple bolt on. Makes the bike look much sleeker. |

249 Chum-me seat.
|
||||
| A few tips for ya
The accessories catalog shows pathfinder fender tips available for the verticals. I got found a front and a rear that had a cheezy older re-chrome job. Perfect for this old beat up bike. Seeking optimum pimptitude, I decided to put them both on the front fender, and hope to later find one for the rear. For the front tip, I made a drilling pattern out of gasket material. Then fit the gasket material inside the fender tip and pushed it down over the bolts. Scribed out along the raised part that needs to hook over the very end of the fender. Cutting away the excess material, I had a simple pattern that allowed me to mark where I would drill. Marked, measured everything three times, and selected a drill bit the same diameter as the mounting studs on the pathfinder tip. After drilling and touching up the hole and the inside of the fender with a small file, I bolted er on. Then repeated the process of the other tip. There are a lot of fender tips out there
with mounting bolts busted off. Tighten the nuts carefully or this will
happen to you.
|

Fender tip.
|
||||
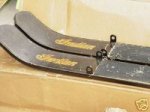
| Skis
on a motocycle? Are you freakin NUTS?
Well yes, but thats not really the point is it? Read the copy on the back cover of the
March 1 1951 Accessories Catalog:
Well, theres not much more to be said.
Even before reading this most excellent copy, I wanted motorcycle skis.
I was hooked. The only problem was to find a set of skis for sale at the
same time that I had money. This rare coincidence occurred at Davenport
2005. Later I was lucky enough to receive a copy of the installation instructions.
So I proceeded based on these. Here they are for those of you who plan
on acquiring skis.
|

Original factory accessory skis... Jim wrote about his 1940 Sport Scout restoration in earlier issues of the VI. |
||||
| INSTRUCTIONS
FOR SETTING UP INDIAN SKI ATTACHMENT
NOTE: Lubricate all moving shafts and pins at time of assembly and as often as required. 1. Attach rear bracket (the one with no threaded spring bolt holes on the shoulder) to the motorcycle frame from under the saddle, using 2 U bolts. run nuts up loosely. (It will be necessary to loosen the tool box bolts to get U bolts around frame tubes on the arrow or rigid frame models.) 2. Attach front bracket to motorcycle frame front tube with 2 U bolts. Position same height as rear bracket and run nuts tight enough to hold bracket in place. 3. Assemble Bendix springs on the front bracket. Insert 3/8 bolt through the inside spring loop and screw into the front threaded hole in the bracket. The Bendix spring that tightens when turned clockwise is assembled on the left side and the other spring that tightens when turned counterclockwise is assembled on the right side. 4. Assemble ski hold up brackets to frame, rigid frame unit clamps to upper and lower rear tubes with U clamps. Spring frame unit is bolted to rear frame vertical channel. Locate bracket just above muffler and drill 25/64 hole for 3/8 bolt approximately 2 ¼ above center line of muffler bracket bolt hole. 5. Slide rear legs on rear bracket and secure with flat washer, lock washer and 1 cap screw pulled tight. 6. Slide front legs on bracket. Assemble outside spring loop into the hollow section of the leg tube. Secure legs with flat washer, lock washer and 1 cap screw pulled tight into bracket. 7. Place skis into position on each side of machine and attach to rear legs with 5 ½ bolt. Draw up fairly snug and lock with jam nut. 8. Now attach front leg to ski, pulling leg down to put a tension on the Bendix spring. Check spring tension, making sure it will lift ski. Adjust if necessary by relocating spring loop anchor stud in next hole. Do not strain spring by adjusting for more tension than required. Tighten front leg jam nuts at ski. 9. Check ski position. It should be level. Adjust by moving front or rear brackets as required. Tighten nuts on all U bolts. 10. Tighten two tool box rear bolts at frame cross member if loosened to get U bolts into place. Use spacing washers and longer bolts to get clearance between U bolts and tool box if necessary. NOTE FOR STARTING: When starting motorcycle to which skis are attached, push left ski down and swing jiffy stand out to hold ski on ground. Here is the result. Now its January and Im waiting for snow! |

Crash bars might come in handy somewhere along the way...
|
||||
|
Chain gang There is a primary chain adjuster kit available for Scouts and Arrows. Indian originally claimed that the primary chain was pre-stretched. But they kept on stretching, which is why a kit was eventually developed. I spoke to one fellow that told me he wasnt worried about adjusting his primary chain. Whenever the wear was too great, he just replaced the chain and his primary cases! He collected them for years and has a lifetime supply! Here are a couple of examples of inventive chain adjustor kits: |
-
Jim wrote about his 1914 Hedstrom (seen lurking in the background in some of the photos on this page) in issue # 10. I hope there will be more about this great bike in future issues. |
||||
|
|
||||
|
Other cool stuff: King Clutch makes a replacement/upgrade clutch kit for the verticals. I bought mine from Ed Glasgow when they first came out, but as you can see its still in the package. Ed also provided a kit of bolts (for the ultimate in bolt on fun). No accessories required. Just bolts. Since the bike is unrestored, they are sitting on a shelf. Then there are the defender bumpers, and package tray. Ill get them on soon enough, but this article has to ship tonight, so there they are on the floor. Actually, I think Ill send this drivel off & go back to the tools. If anyone ever reads it, it must have been good enough. Later! |

Defender bumbers, package tray and King clutch. |
|
|
|
|